Creating Custom Activities
How to develop, configure, and deploy custom manual or automatic activities for your process flows.
It is possible to create your own activities that can be used in the editor and then executed on your own server when they are reached in the process. These activities can be either manual tasks—made available to users in their worklists for processing—or automatic activities, which run immediately without user interaction.
In this walk‑through we build an automatic OpenRouter activity. In the editor you will be able to supply a system prompt and a user input. At runtime the node calls the OpenRouter API and writes the AI response back into the workflow. The sample process lets a user enter a topic, asks the AI to explain it, and finally shows the explanation to the user.

Step 1 – General Details
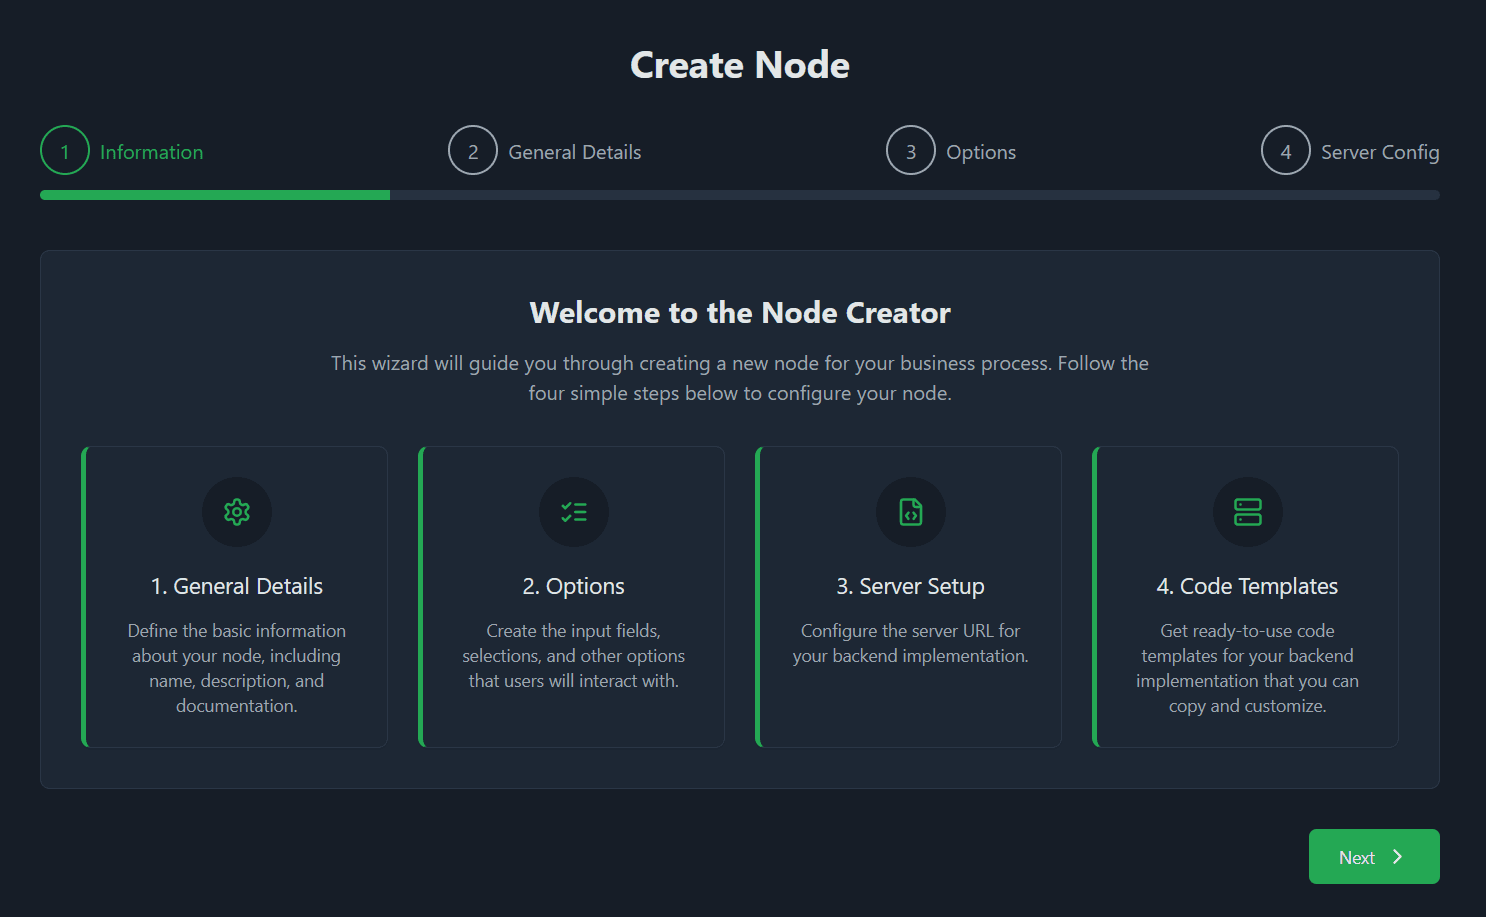
Open Shop → Create Activity. The wizard shows all steps you will complete.
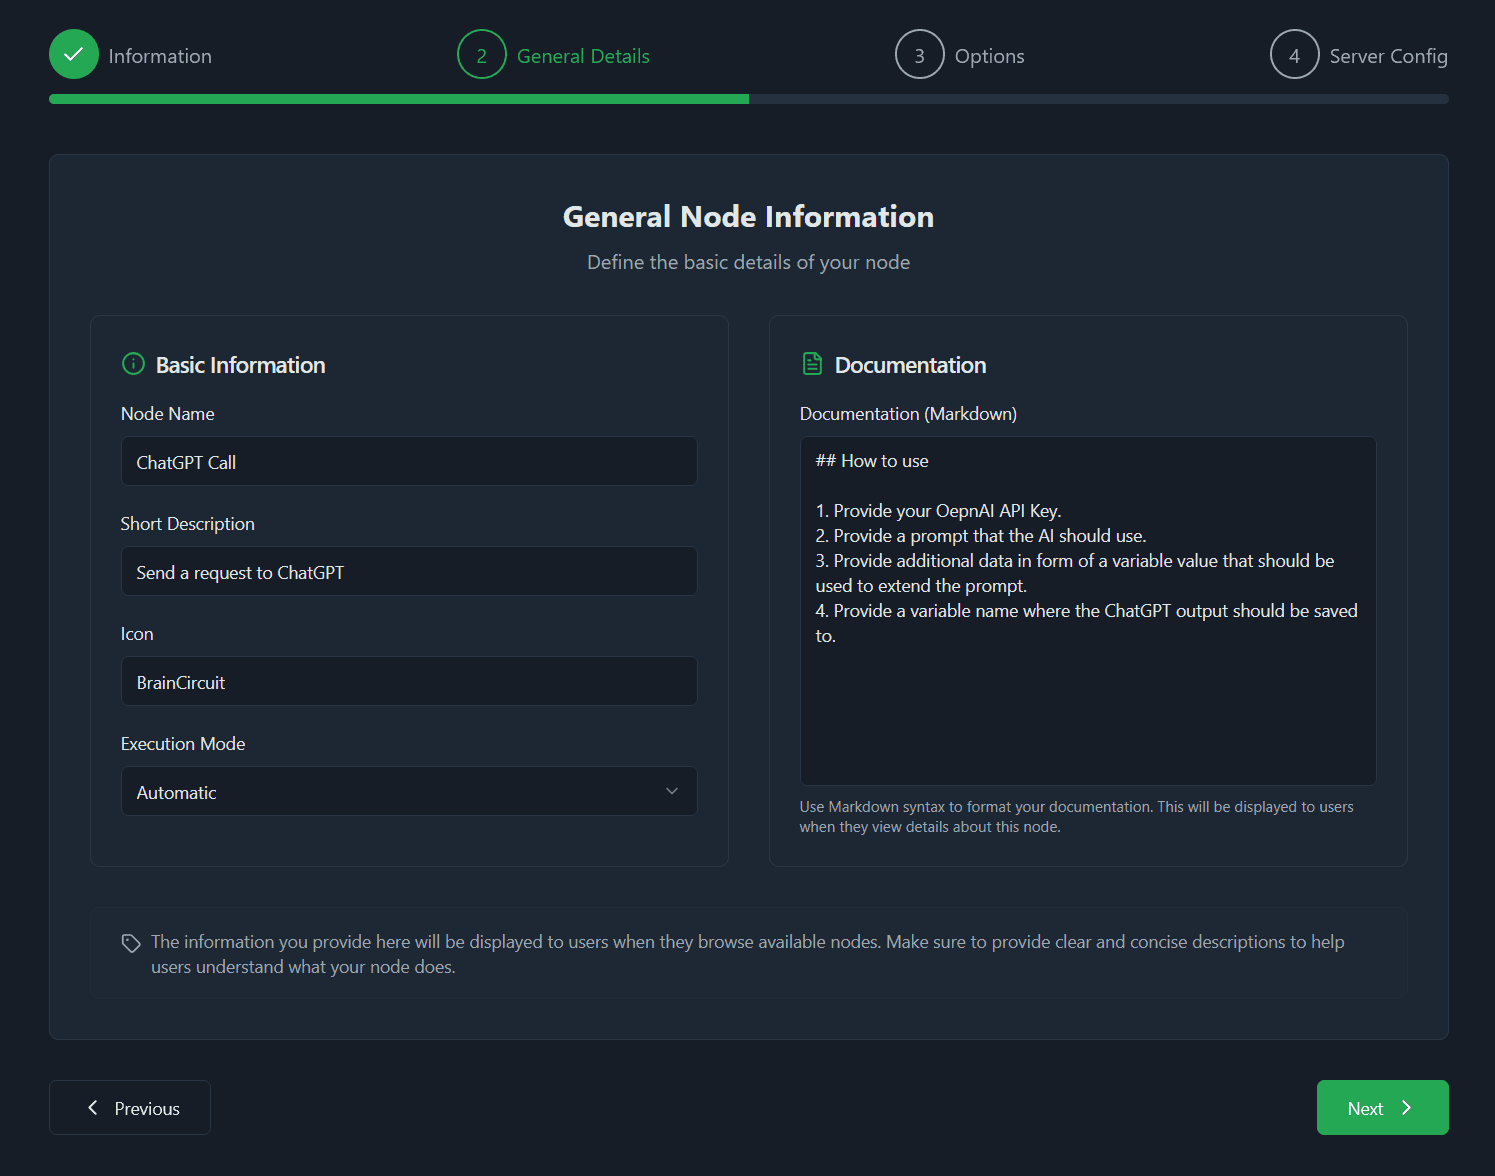
In the second screen provide the basic metadata:
- Display name shown in the editor
- Short description for the shop
- Icon name (see the catalogue at Lucide.dev)
- Execution mode – Manual (user works on a form your server renders) or Automatic (logic runs on your server without user input)
- Detailed description (Markdown allowed)—use this to document what the node does and how to configure it.
Step 2 – Editor Options
Define which configuration fields the editor should show when someone drops your activity onto the canvas. The values entered there are sent to your server at runtime.

Click Add new Option to insert a field. The list below the button lets you configure each option; the preview on the right shows how the panel will appear in the editor.
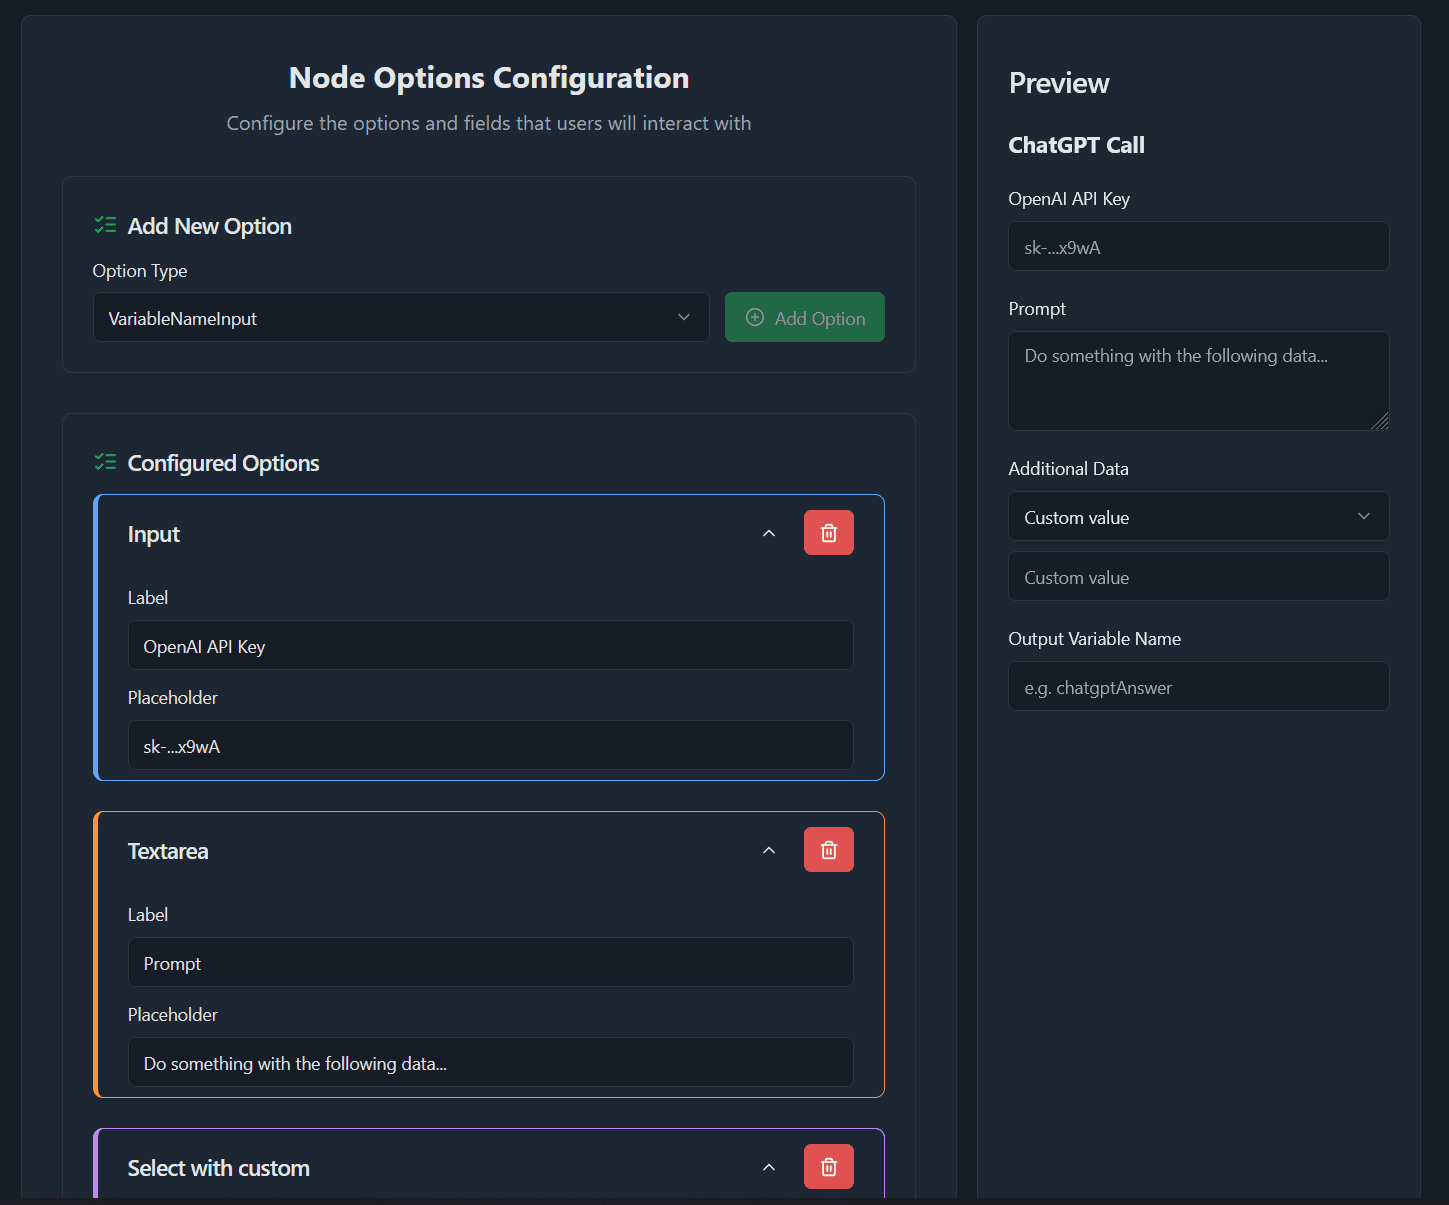
Available option types:
| Type | Purpose |
|---|---|
| Text | Static explanatory text shown between fields. |
| Input / Textarea | Single‑line or multi‑line text input. |
| Select / Select with custom | Drop‑down list. You can nest further options that appear depending on the selected value. Select with custom additionally lets the editor user type their own value. Tip: use {availableVariables} as an option value to let users pick any existing process variable. |
| Checkbox | Boolean switch; nested options can depend on its state. |
| Variable Name Input | Text field where the editor user defines the target variable that will receive the node’s output. |
| Separator | Horizontal rule to visually group fields. |
| Row | Container that arranges child options side by side. |
Important Every option needs a label—internally the label is used as its key.
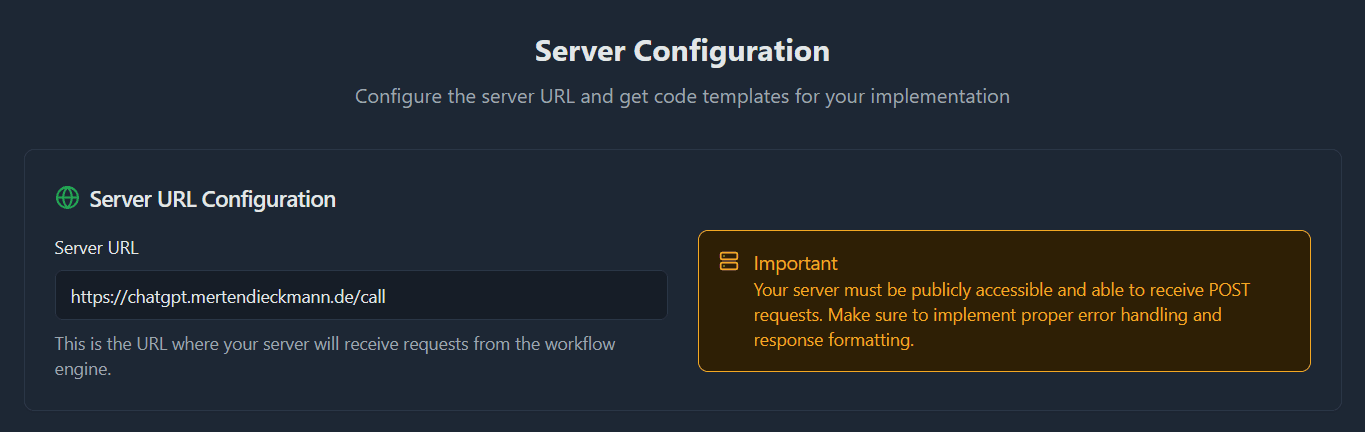
Step 3 – Set Up Your Server Endpoint
Tell the wizard where the workflow engine should send the webhook when the node runs.
The next page offers downloadable code templates (ZIP) already wired with your chosen options:
- Automatic mode – Node.js and Python stubs implementing an API endpoint that responds to the engine.
- Manual mode – A Next.js component that receives the instance data and renders a simple UI.
Make sure you adjust the endpoint URL inside the template if necessary and to implement your business logic.
Payload contract
Your server receives the option values plus three technical fields:
| Field | Meaning |
|---|---|
responsePath | POST your success payload here. |
errorResponsePath | POST error details here. |
flowElementInstanceId | Correlates your reply with the running activity. |
💡 Always return HTTP 200 OK immediately to avoid workflow timeouts.
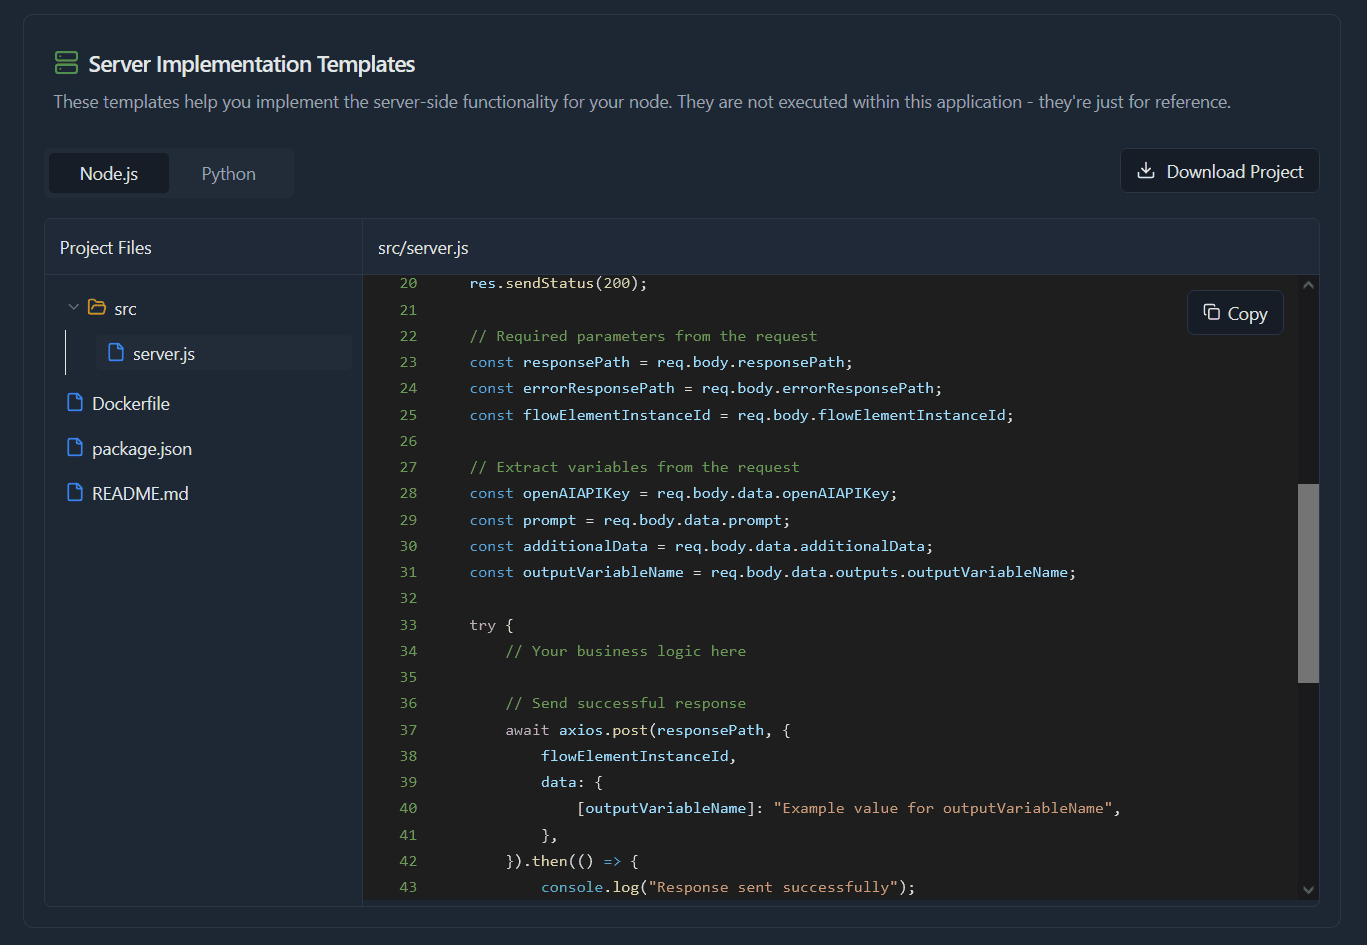
Example – OpenRouter server (Node.js)
Step 4 – Use the Activity
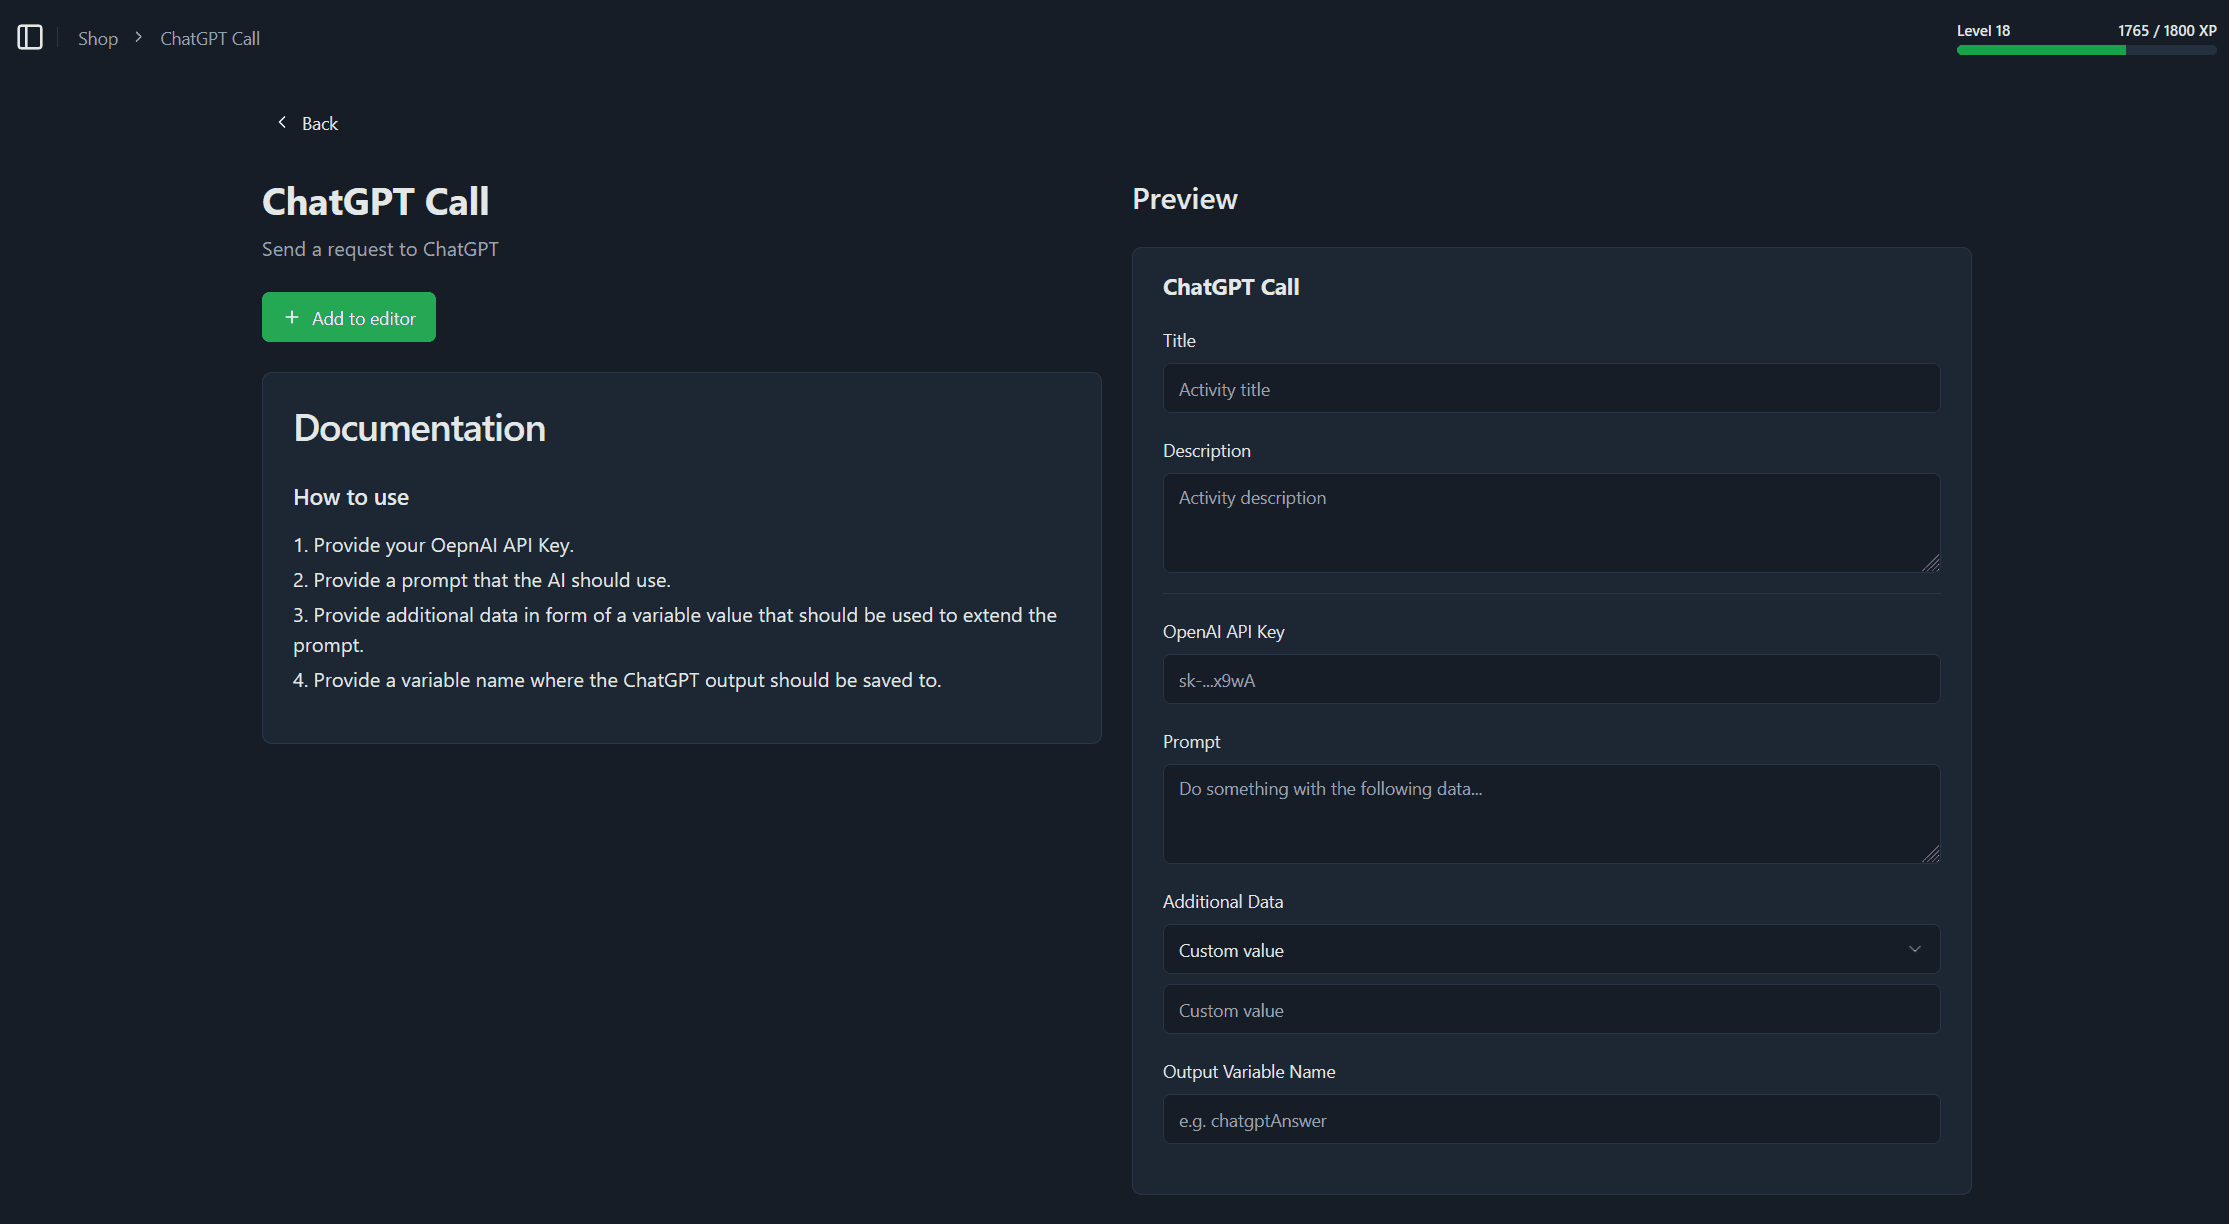
Once saved, the activity appears for everyone under Shop. The detail page shows its metadata and an option preview. Click ➕ Add to Editor to make it available in the Editor. Your own created nodes are listed under My Activities and your saved nodes for the editor can be managed under Saved Activities.
In the sample workflow below, a previous node stores the user‑entered topic in the variable {input}. The OpenRouter node reads this value via the User Input field.
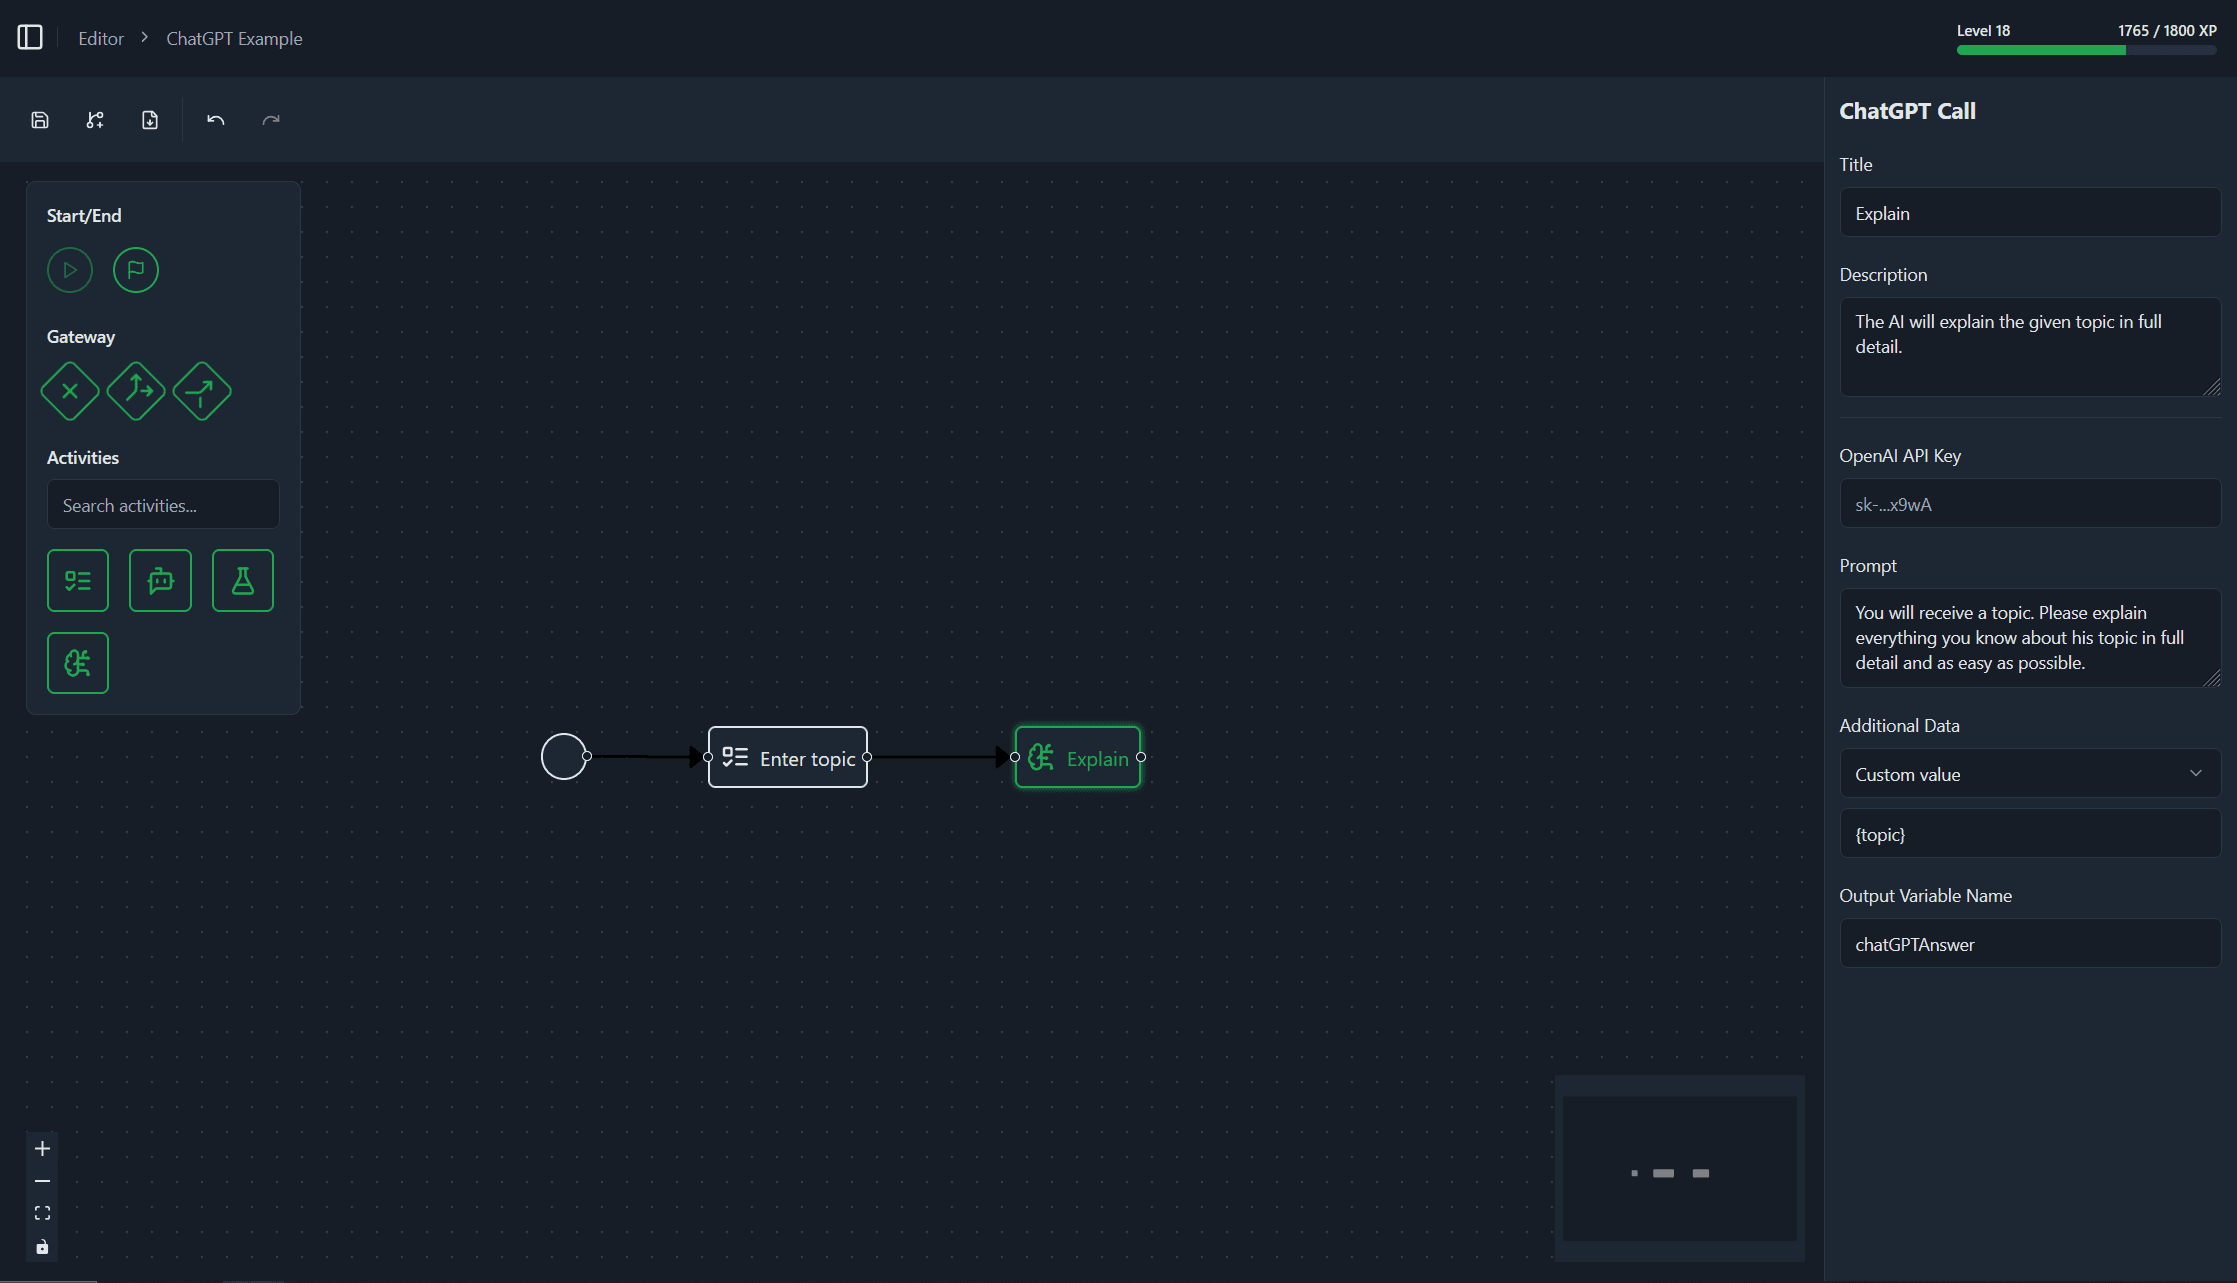
Finally, the process shows the AI’s reply ({aiResponse}) to the user in an info‑text task.

By following these steps you can package any custom logic—whether a simple webhook or a complex external service—into reusable activities for your processes.